Got a Question?

FAQ

Hopefully you can find what you are looking for listed below. If not, don’t hesitate to reach out to us on the socials or by email.

A video is worth 1,000 words right?  Here’s ours, and a few thoughts below it. Irises in general are hardy and want to flourish, get the basics right and trust them to grow!

Here is basically the same information typed out, incase you would rather read it.

And the basics are –

  • Your rhizome should not be buried like a bulb.  It is happiest within the top inch or so of the surface.
  • Don’t cover the rhizome unless you are in a harsh zone and your personal experience or a local expert recommends it.
  • It also likes to lay horizontally with the roots pointed down.
  • Well drained soil is critical.  Standing water can cause disease.
  • Plenty of sun!  A key to beautiful blooms is the rhizome seeing the sun.
  • Space iris 12″-24″ apart.  This will impact how often you will need to divide as they will spread out.
  • Try pre-loading the hole and soil with water. Not a lot, just get it down by the roots to wake them up.

About any forum you ask a general iris health question on, the first response will probably be to ask how deep they are planted. A lot of issues with disease are tied to planting depth. We have had our best success with mounds, elevated beds and terraces.  

Do you ever get tired of hearing about well drained soil?  Well, here it is again.  You don’t want irises in standing water. They like to drink and let it seep away. I’m not sure of the source but I once heard that iris like wet toes, but dry knees.

They usually like a slightly acidic to neutral pH, and they aren’t crazy about extra nitrogen. We did a little experiment with phosphates that you can see HERE.

If your soil is just too heavy, you can try amendments like humus, peat moss or compost. Some like sand, and it might work for you, but in my clayish soil, sand seems to be the final ingredient to make adobe.

 Your iris is going to reach out and down, we have had better results with a 12″ deep bed, rather than a 3″ layer of prime soil over packed clay.

Yes! Some of our happiest flowers have been in planters.  Planters are great for drainage.  The picture below is of some of our seedlings that hopefully bloom in the spring. We took the rest of the group to the farm and the planters definitely out grew the farm.

Initially your irises will need to be regularly watered until the roots are established. So keep them moist for the first 10-14 days so your soil is cool in your hand, but not soggy. Once established, iris are drought resistant and pretty forgiving of dry spells.  Water deep, at ground level to avoid getting the foliage wet, and let the top layer dry between waterings.

You want to avoid sprinkling the leaves as the water drops can collect fungus and disease such as leaf spot.

This is a tough question because we all start with a different soil base. Ideally, we should all get our soil tested at our local County Extension Office. My local universities offer testing at reasonable prices too.  Then you want to build a fertile soil that has a pH that is slightly acidic to neutral .

We did a little experiment, the video is linked below, where we played with different phosphates added at planting. The results were interesting. We used our local nurseries potting mix in gallon containers, and found the best root growth came from a dash of bone meal, roughly a heaping spoon full. We have seen great results from bone meal in the field too.

But we wouldn’t recommend a broad additive suggestion for every case, each soil is unique. Over time you will get to know yours and what works best.

A reblooming iris is an iris that has more than one cycle of blooms in a year. This is done through hybridization. The iris has genes that control the plants sensitivity to the length the of day, the need for a winter or vernalization, its growth rate and its likelihood to bloom. These genes are combined such that the iris will keep going through blooming cycles without needing a break.

Our USDA Planting zone is 6A. We aren’t sure this is the greatest zone for rebloomers. We have had pleasant surprises sometimes late summer, sometimes as late as Thanksgiving or Christmas.

Rebloomers may need a little more water than the standard iris, they should also be divided more often.

But these blooms aren’t the same as the spring explosion where every plant is trying its best to bloom. This is usually a single or a few stray stalks. Beautiful yes, but we just don’t plan on the same show as the spring. Its great if it happens, but we don’t, well you can’t, make a plan for when it will happen.

We also see a lot attempts but they don’t quite open. Rebloomers need some extra food and care after their first blooms to enhance the chances for a second or third, and we haven’t made this a part of our care routine.

I have a friend in Texas that loves her Immortalities and will get up to 5 bloomings in a year. That is amazing! We just don’t see that.

Here's Feedback, making a surprising reshowing in early November.
My Immortalities in spring prime. I couldn't find a picture, but the October showing was just a few solos.

What a great question! And maybe a little bit of a loaded one as we are really excited about what we have learned lately about roots.  Here’s the video if you don’t want to read about it.

Before our little experiment we thought that old roots were only needed for anchoring the rhizome in the soil. And that is still the case, but we did a little test and saw that there is more to it. We took 25 rhizomes, the same species all dug on the same day, cleaned them up and stored them cool and dry, for about a month.  Then we planted them all in the same soil mix but gave each group of 5 a different additive.  Most of the additives were different forms of phosphorous. We were hoping to see differences in the groups of how fast the new roots were grown.  Well we did, and you can see the results in the video, but spoiler alert! The exciting part was to see the differences in growth on the old existing roots, they were still full of life.  

We are big advocates for getting your rhizomes into the soil as soon as possible.  Yeah, we know they can go dormant for a period of time and then wake up. Yeah, we know that may even be as long as a year.  But we also know that it is tougher to get the highly sought after first spring blooms out of a completely dried up, dead looking rhizome. We see great advantages to getting them settled into their new homes sooner than later. Before they loose those life in the existing roots. Before the rhizome has to pul all the moisture out of the foliage and it all dries up. Do this and the chances of seeing a spring bloom go up.  Its all about the blooms!

If your shipment shows and you can’t get them in the ground there are a few options. The sooner the roots touch dirt the better but maybe extreme weather, or you are still working on your landscaping and the spot isn’t ready.

  • Keep them dry and store in a cool place. Good airflow helps. They can wait there until you can get to them.
  • We have had success potting them.  We got a shipment during a record heat wave and it would be difficult to keep them from scorching in the sun.  We potted them in good soil with a little bone meal. We waited until late August when things had cooled down. Be careful with the new roots.

There is probably a lot going on underground. The rhozome initially will put its energy towards growing roots. For the first few weeks keep your soil moist enough it is cool when you touch it, but not soggy. If the summer heat seems to dry it out too fast you can add mulch. But keep an eye on them and don’t leave the mulch after the first few weeks. In general, mulch raises the risk of holding too much moisture, which can cause rot.

I keep a watch out for the youngest blade, the one right in the back middle, to grow and peak up over the trimmed fan. This is a pretty good sign that the roots are happy and it is using some energy to grow foliage. 

Even though you ordered in April or May, we won’t ship until July or August. We try to stress this throughout the ordering process, we open the web site in the spring and you can order the flowers then.  But we can’t dig them up yet. Doing so would be too early, they would have a harder time with the transplant and a decreased likelihood of success. We wait until the blooms end, we feed them well and give them a little time (6-8 weeks) to increase (make new rhizomes ). We dig late summer to early fall dependent on weather conditions. As soon as we start digging, then there is an urgency to get them prepped and shipped to you, but not before that. You can see the DUG DATE on the rhizome label.  You may have purchased them before the DUG DATE, but we were taking care of them for you until they were ready to move.  

Sometimes, come spring, the iris has winter killed. Email us a picture of the plant and your receipt.  We will replace it in the fall or issue you a credit for another flower. Waiting another year for that bloom can be frustrating, irises do test our patience sometimes

The Iris grows by sending off new starts that will send up leaves and eventually its own bloom. These are often referred to as an increase and a single iris can grow several each year.

Depending on how much room it has to grow, it will eventually crowd itself out, grow into the area of another plant or beyond the garden.  At that point the iris should be dug up and divided.

Even if it has plenty of room, you can see in old patches that are over due to be divided that the center of the group suffers, the rhizomes are so thick they are competing for soil and water.  Some will die off, look wilted and skinny and stop blooming. The patch will look circular with an empty middle.  

Each increase can be split off as its own stand alone rhizome.  You can then space them out and rearrange your garden to start again, you can move them to a totally different location, or give them to a friend that wants a start.  

There are some great videos out there on how to divide irises, eventually we will make one and post it here.

Iris are among the early risers after winter. Depending on your local climate they may start as early as May and we have a few that wait as long as July. We try to let you know on each of our irises by saying if they are an early, mid season or late bloomer.

Unfortunately, the blooms don’t last forever. Individual blooms are usually measured in days, the entire stalk may have multiple buds that take turns going down the stalk so the plants can last weeks, maybe even a month.

This is why some like irises with a high bud count. 

Rebloomers will have a spring bloom, usually earlier, then may bloom again or even multiple times.  The subsequent blooms may not be as thick as the main spring bloom.

We try our best must mislabeling can happen. Please send us a picture of the bloom and your receipt, and we will get you the correct rhizome. Sorry this will be a timely process as we won’t be able to send the replacement until we dig at the end of the season.

The fall is good time to clear out extra foliage and to tidy up around the iris.

Occasionally I see yards and gardens where the irises are all neatly trimmed back to 4″-6″ as the last blooms die. We don’t recommend this.  The iris still needs that foliage for photosynthesis, there is critical growth going on for increases and preparing for next years blooms.

Some may feel they should be trimmed back in summer as this is what they looked like when they were first planted the previous year. We like the full green foliage, and let them be until dormancy.

You can remove foliage that is dried and also spent stalks can be snapped off or trimmed back. We also break off spent blooms to get them out of the way of the current bloom.  And you should remove leaves suffering from leaf spot or other signs of disease and dispose of them, don’t compost them due to the disease.

At the end of the season you want to get rid of foliage that can trap moisture or offer housing to pests. Going into winter, all the remaining foliage will die as the rhizome goes dormant. It will start over with new green shoots when it awakes.

Here’s a link to a map of the USDA Plant Hardiness Zone

Type in your zip code or zoom into your town and you can see it is color coded to tell you your zone.

Zone 1a corresponds to an average low winter temperature of -60 to -55 degrees F. Zone 13b is a scorching winter low of 65 to 70 degrees F. We are right in the middle at 7a.

This is a great tool when talking to iris friends, as you can deduce why you are seeing different behaviors in your flowers than they are.

You will make decisions such as best times to plant, planting depth, mulches, watering, fertilizing, and dividing.  Your zone is one of the variables that will shape these decisions.

The basic answer is 12″-24″ between your rhizomes.

Somewhere in that range is your best spacing.

If you like to redo your garden layout every year, then you can go 12″ as you will have a few increases after one season with minimal space gain.

If you want to plant the iris and let it be there as long as possible. Then you want to space out wider and let the iris take over the allotted space.

You should plan on dividing at least every 5 years just for the health of the flower.


Here's the first year bloom from Time Out
Here's year 2, more blooms, more rhizomes, more space

There are two ways to get more irises. You can divide your rhizomes and plant them in new places. The iris will look exactly like the original and is genetically identical. You will not get new variations from divisions.

The other path is to grow the iris from a seed. Each seed is genetically unique and will have similar traits as the parents. Each child will be genetically unique.

Hybridizers like to create these pairings and patiently wait to see what the children will look like. Each is a possible new combination of colors and traits.

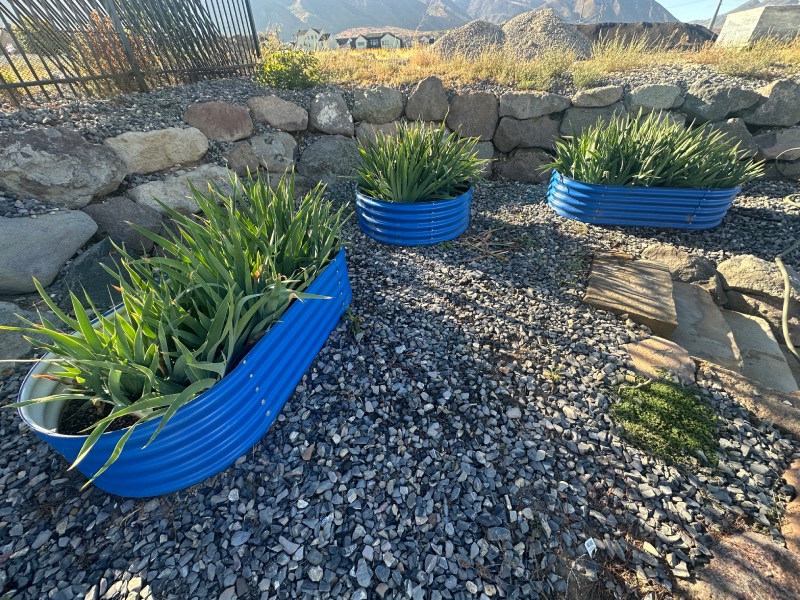
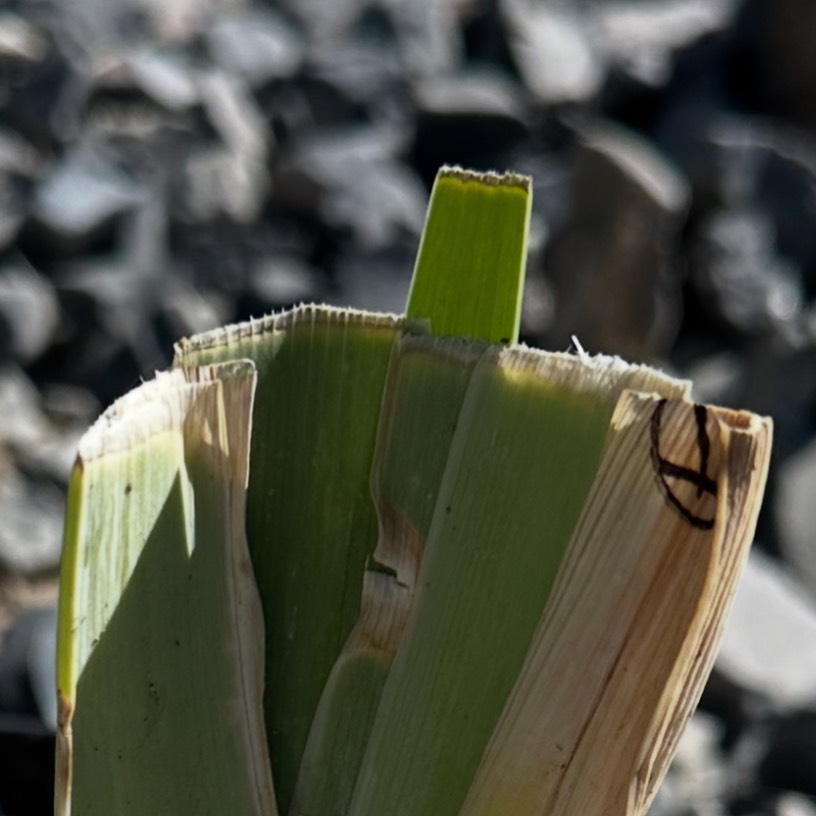
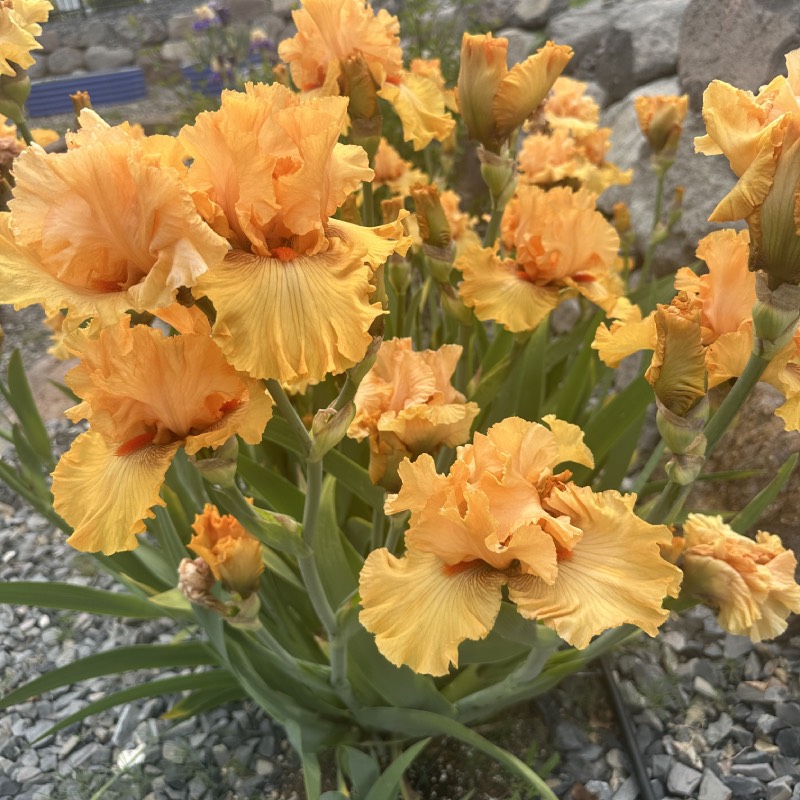
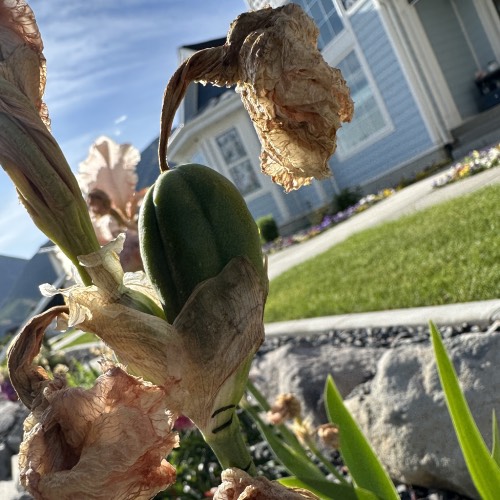
This is done by taking the pollen from one and putting it on the stigmatic lip of the other. The receiving iris, often called the pod parent, if the pollination is successful, will create a golf ball sized pod of seeds.  There can be a few , or  70+ seeds in each pod. You may have seen these pods in your gardens, as bees are the original hybridizers.

In the fall, these pods will dry and open, the seeds falling to the ground and nature continues from there.

Hybridizers intervene, collecting the pods, carefully keeping records and labels to try to keep track of each pods genealogy. 

From here, there are different techniques to get the seeds to new blooms. Some just plant them and trust Mother Nature.

Others will rinse the seeds for 10-14 days to break down the protective covering on each seed that in nature, spreads germination over years, favoring wet years that have washed the seeds naturally.

They will then refrigerate them to simulate winter and bring on germination after 100 days or so.

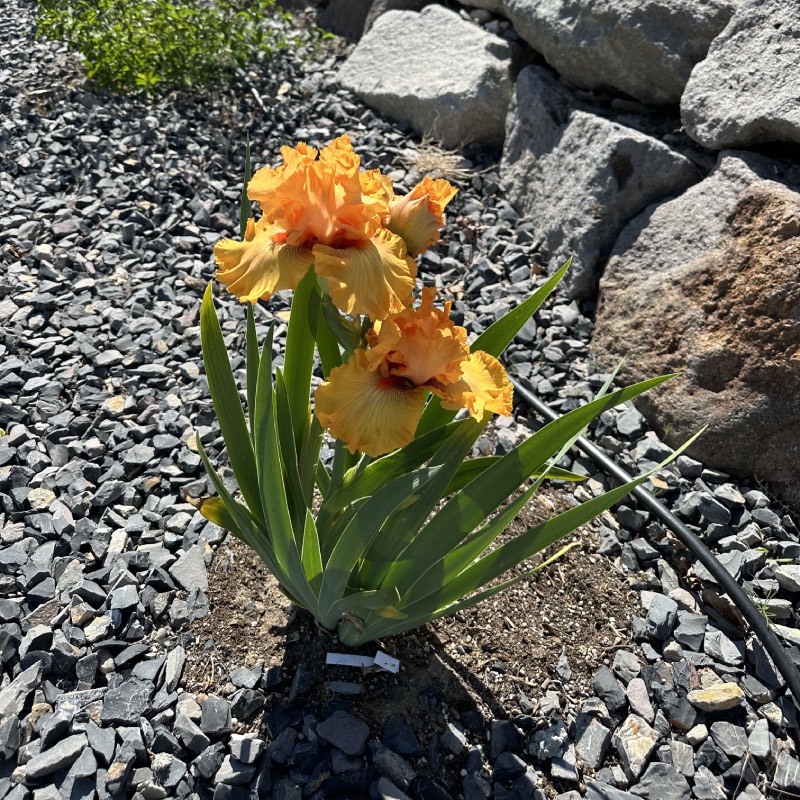
The germinated seeds are planted and cared for, eventually maturing and showing a bloom that has never been seen before.  There’s a good chance it will look just like some other existing iris, but genetically, it is brand new.

The unique ones are cared for, registered with American Iris Society, propagated and eventually introduced as a new variety. A flashy new name is a must.

The process from pollenating to the first bloom takes roughly a year and a half. There are tricks of the trade to speed this up, we have found that any time we try to hurry Mother Nature she seems to set us straight.

A seed pod full of new, exciting blooms.

Top Quality

Each rhizome is dug, washed and dried. Then thouroghly inspected to ensure the same level of quality that we demand of every addition to our own gardens.

Shipping

We dig in mid to late summer, and ship late summer to early fall. Look for the “DUG DATE” label on each rhizome. Our goal is to have them shipped within the next week.

Be ensured that we protect your data and your purchases. Please review our Privacy Policy prior to purchasing.